

Did you guys know I started a clothing line? American Duchess Apparel creates graphic tees that interpret the whimsical, natural, and feminine ideals of the past, with a particular focus on the 18th and 19th centuries.
It's getting towards holiday gift-giving time, so here's the flier to let you all know that the online ADA shop is up, running, ready to receive orders:
www.AmericanDuchessApparel.com
It's a pretty cool experience as an artist, working up a brand from nothing. I've done all the t-shirt illustration, of course, but also the graphic design on the fliers, labels and tags, and website (and coding too!). The business side - the world of wholesale and garment manufacture - is fascinating as well. I'm hoping to do well enough with graphic tees to release three new designs each season (once I get rolling), and to expand into other kinds of apparel, like jackets and hoodies.


 One day I sketched up a bunch of owls, all in a row, all different shapes and personalities. I cleaned up the linework, vectorized, and turned them into embroidery patterns, hooray! They're


 Color guide for the embroidery, with the stems of the flowers worked in metallic silver
 The roughly traced and altered sketch


 Next, see to your brushes. I am using Photoshop for this painting, but would like it to have the nice "real media" quality you can acheive in Corel Painter. I created a set of 3 brushes to emulate hairy-oily brushes, with one of the brushes only having a few "hairs" in it. I will use the thickest brush for the majority of the painting, and the thinner hair brushes to add texture and particularly to paint in the mane and tail. Too see a tutorial on how to make custom "oily" brushes, click

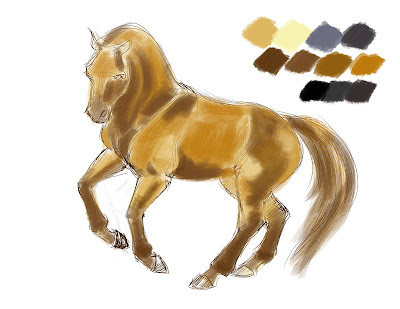 Now it's time to start working with your blues. Using blues, instead of black, for your darker shadowed areas lends your subject a life and interest. Blue and orange are compliments, and form a lovely balance and richness for the eye when paired, even in their subtlest forms. Start blending the darkest grey-blue into the shadowed areas.
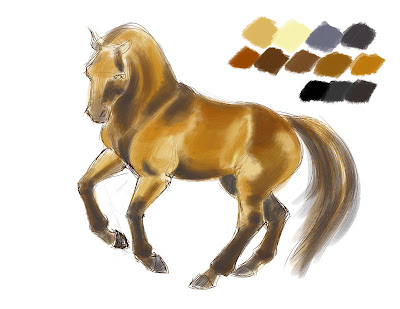
 With the lay-in of colors complete, begin rendering by smoothing and blending. Continue to build up colors, and don't worry about brushstrokes, sketch lines, and base colors coming through in some places. Keep the edges of the shadows and lights fuzzy - hard lines will make the horse look plastic or flayed.
  You may decide at some point that your body color is too hot or saturate. I desaturated my reds by using the "Hue/Saturation" tool and reducing the reds only.
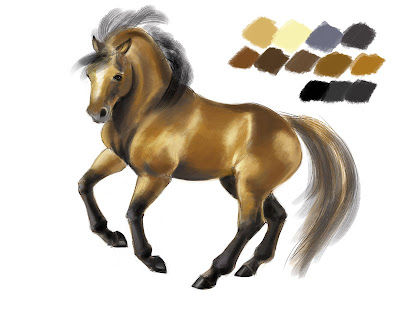
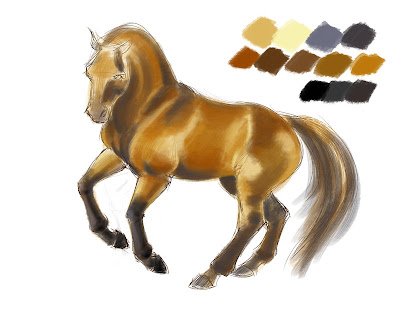
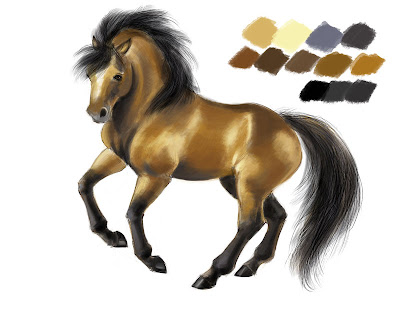 For finishing, I used a regular round brush, with opacity and flow on pressure-sensitive, and cleaned up the edges all around the horse, erasing some of the rough linework and stray paint. I liked the look of the sketch showing through the painting in some places, so I left a bit of it. I also rendered the hooves roughly, with clean edges, and painted in the eye.
 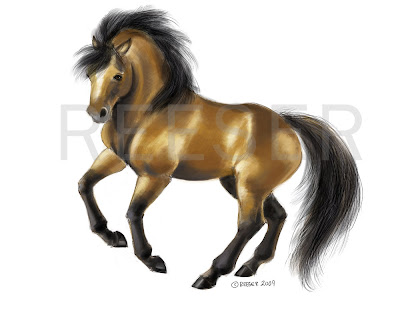 I hope you enjoyed this step-by-step! Please notes and comments in the comments section, or post links to your horse painting!